20091027

Done!!

While the twins were in preschool they did a little paper maché project and made "dinosaur eggs". After they forgot about them I greedily kept one for this very purpose - to make into a vintage Halloween bucket. Let's just say that this project has been way overdue. My kids are already in Kindergarten and I finally got this done. Finally. It took me less than an hour to do it (+ the two years I've held on to the spotted thing). Living up to my ghetto ways. I am pathetic.
I tell you this because it's really not that significant of a project but more of an inspiration for me to keep attacking my "want-to-do's" and making them my "I-finally-did-it-high-five-to-me!'s".
Onward Ho:
Step One: Take a hollow paper mache bowl...

Step Two: Cut out eyes and mouth with an exacto knife

Step Three: Paint any color you'd like. I was making a pumpkin so I chose a deep orange (Obvious, I know)

Step Four: Draw some eyes and a mouth (I did mine using Illustrator), print/cut out and tape inside.
Punch holes on either side of the large opening on top and add a wire handle...
Yeah, his eyes are a little large. Looks like he's just as surprised as I am that I finally did this thing...

Step Five: Add embellishments. He looked a little bare so I gave him a glittered triangle nose. This part would be fun if you made a black cat with ears or an owl.... Time to encourage my kids to make more dino eggs (i.e. exercise some child labor) so I can make more old school cools.

Step Six: Fill with candy!

20091025

Bottlebrush Trees

Just in time for Christmas. I think old bottlebrush trees are such a cool vintage-y thing to decorate with for the holidays but they aren't that easy to find. Lately I've been looking for sources to buy some and came across a tutorial on how to make your own here.
Nice! I think this makes a great candidate for the next craft night I organize. Who's in?
These are dyed and have snowy effects, but think of all the options: Pastel colors, vintage beads, mica flakes, glitter, paper garlands.... fun fun.

PS- And Halloween trees? I am so making those...

(This first image is from Vintage By Crystal. She has some cool old spun wool art decorations that I LOVE.)

Small Scale

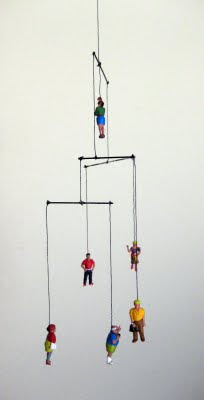
I stumbled across this blog and read her creative idea to make a tiny mobile out of miniature tourist peeps. Thought it was cool and, hey, maybe you would, too.

Mobiles are fascinating to me. I need to make more of them.

20091015

Mask-er-raid

Daaah.... too many things going on!
Many of them Halloween related of course. I've been meaning to post these for a while now. Found them at Michaels and thought they were great! I love the larger face mask- I envision simple painting with wide, dark satin ribbon on each side and hanging on a wall or secured on a stick for a masquerade thing, even wearing one when I hand out candy.... even painted black and alone on a mantel... and best of all, CHEAP. So I kind of raided the stock and bought a good amount.
I've finished the Halloween party invites and am now working on macabre banners, costumes and other such frivolity. I'll try to actually complete something soon and post it here. I still have award ribbons to make. I've got to get off this computer!

20091002

Halloween Banner

Thought I would share how I made banner #2. First of all, high-five cuz I actually went through with something for once. Man, it's been too long since creating and I need to get going.

I had a few friends come over and join me in making this which, I think, is what makes this stuff half the fun. So gather some buddies, share supplies and knock one out.

The chipboard and letters were all from a pack that I picked up at JoAnn's. One of my friends, Sara, brought a simplified banner of letters hung on ribbon from Michaels (from Martha) and added onto that. So work with whatever you want.
The assembly was similar to the banner I did a couple of months ago.
I cut the flags to 4" x 6" and we all covered them differently. I used paper, Jennie used fabric, etc. Using crepe paper again, made different circles or shredded backing for the letters. We glittered the letters and glued them on and then embellished with random things. The flags on each end were covered in paper like the others, then I used large bottle stickers from Martha (via Michaels) on top.
I used three yards of a black trim that I also found at JoAnn's and just hot glued the flags right to it (thanks to Jennie's clear thinking- I was totally overcomplicating it in my mind and think this looks great). Done!
Hope this inspires you to try one.

20091001

Modern Mail


Clever card designs by a.favorite design.
See? I knew tickets were cool.